facebook twitter instagram YouTube
  • Home
  • Travel
  • Life Style
    • Category
    • Category
    • Category
  • About
  • Contact
  • Download
Powered by Blogger.

Ridley Jing

Hello again~
Today I will be sharing something special with all of you. =)
Thanks to The Butterfly Project for the invitation to the elegant "Tai-tais style" Butterfly Soiree's session with the others beautiful butterflies at the newly refurbished Posh! Nail Spa, TTDI. It's definitely one of my best Saturday evening.


It's really nice to have such a nice session for one of my Saturday evening. I got to pampered myself from all the hectic days of working. Not only I can get the first class manicure and pedicure during the party, there's also a cocktail session by La Rose Noire & Wine Talk Malaysia too.

When I was there, I was so happy to see the nicely decorated desserts on the serving table. It definitely brightens up my day because I really like sweet things. =)

I don't feel like eating it because it's too pretty!

Definitely amazed by this Eiffel Tower which was decorated by macaroons.
Thanks to La Rose Noire for all these awesome desserts.

To further perfect the dessert session, we have the chance to pair it with a slightly bubbly and sweet Moscato white wine. All thanks to Wine Talk Malaysia for the white wine. I'm not a wine person but I really like the wine of that day. 

It's really good to have the expert to further explain about the desserts and the wine. I really did learned a lot especially about the desserts. (Not really know about other desserts except macaroons, lol.) 

The party started with a talk given by the founder, Sereen.
She was also very kind to showed us around the newly renovated Posh! Nail Spa, which was a good chance for me to explore more about the place.

The indoor environment decoration was so minimalism with simple white and dark colors design. It's very cozy and comfortable environment to spend your time here.

The nail polish colors selection display on the wall.

Award trophies and some nail arts decorations.

The huge wall background decorated with some beauty things such as nail polish, nail art inspiration designs and makeup brush. They said they will put on more things to make it even more pretty. It's definitely a good background for nice photos.

More nail arts display. 

Makeup section which is like a dream for me.
I always wish to have a makeup area just like this in my room, I believe every girl does dream to have one of this awesome makeup section just for themselves.

Equipped with a huge collection of makeup tools.

Then, we have the Nail Artist explained about her nail art inspirations.

These were all designed by her.
I really like the pastel colorful set on the top right side in the photo.

Munching on Macaroons.
I really like sweet stuffs, definitely a good chance for me to grab a few different desserts to eat during the evening. La Rose Noire did spoil me with their desserts, taste so good.

I pretty into this one, discovered this new desserts, Les Petitclairs, thanks to La Rose Noire.

Finally met her, Rachell during this evening session after so many events.
Thanks to her for bringing me around to know more butterflies~

And then, here began my "Tai-tai's" lifestyle for the day.
We can have either manicure or pedicure express service on that day. Since most of my nail color on my toes were completely came off, I decided to go for the pedicure.
Finally can get rid of my old nail colors and move on with new one.

Can see my expression, super happy and satisfied with the service~

For the pedicure, we were able to choose up to two colors for our toes nail.
I chose to go with only normal plain colors for my toes since I wanted it to be simple and neat. Since there were a lot of color selections by Posh! I kinda had a difficult time in choosing the right colors to dress up my toes nail.

Thank you for the nice service.

Please forgive my super ugly toes. lol.
The color I chose was a plain dark purple. It was a bit too plain, so I decided to add some glitters on my two big toes nail for a little bit of 'bling bling'. The reason why I prefer a darker colors for my toes nail was because I believe that dark color toes nail can make my leg looks whiter. Lol.

Pretend to be Tai-tais again in this photo. 
Thanks Nicole for helping me to take this photo, she was so kind and I was a bit surprised that she offered to take photo for me. I really appreciate it. =)
I was actually reading their booklet (Not pretending ya..) while waiting for my toes nail's colors to dry completely. Normal nail colors need more time to dry up so if you are going to do normal nail colors (not the gel color) then you will have to be patient and wait for like... roughly two hours for it to dry. And remember to bring sandals/slippers to change on because you will not want to spoil your nails color. =)


The end results of my toes nail color.
And also the end of my 'tai-tais' lifestyle. lol.

It's definitely a well-spent evening at Posh! Nail Spa. =)

For more details:
Posh! Nail Spa: http://www.poshnailspa.my/
La Rose Noire: http://la-rose-noire.com/index
Wine Talk Malaysia: https://winetalk.com.my/

Extra session with Posh!Nail Spa...
I actually got some vouchers for my next visit, which was so awesome. June is my birthday month and I really excited to get my nails done by using these vouchers.

I'm so happy to have my nails done before my birthday and I really like the colors. Accidentally found this colors that change from blue to purple under certain light condition. It's really a nice gel colors. Along with the blue purple colors, I also paired it with a glittery light purple color, the best colors combination ever! (based on my own opinion)


That's all for my review.
xoxo.
Like my Facebook Page: Ridley's Bloggie
Subscribe to my Youtube Channel: Ridley Jing
Follow my Twitter: Ridleyjing
Follow my Instagram: Ridleyjing
Monday, June 26, 2017 1 comments
Hello people,
Today i'm going to review about my new nail art again. lol. Can't imagine that i will be so into nail arts.

So the nail art that i wanna review today is the Black and White theme designed by Cherry. I did not diy my current nail art, all i did was suggesting the design and colors i want for my nails.

Thanks to Born Pretty Store for the cute little white ribbons and the rhinestones, it really does create a cute look in nail art. Since the ribbon was white in color with black dots, so i decided to make the whole nail art based on black and white color. I also decided to use silver nail color to make the whole nail art more shiny, catchy and attractive. 

Decided to did some 3D nail arts too by using white and black color gel color. It was a new thing for me because it's 3D. And for your knowledge, it was my first time to color my whole nail instead of half, did you notice that? lol.

This is the overall look of my nail art for this month! 

Nice or not? lol.
Personal thoughts:
I personally think that black and white color are easy to match with all the outfits and accessories. It also easily creates an elegant nail arts, however that depends on how you design it. For the ribbon, since it was attached to the nail arts, i have to be extra careful with it because i scared that it will fall off when i knock my nails on something. Since i decided to use hard gel for my nails, it tends to last longer. 

Did I said that the ribbons and rhinestones were from Born Pretty Store right?

If you are interested in their products, here are the links to the products that i got from them...
The cute little white ribbon~
Link: http://www.bornprettystore.com/5pcs-lovely-rhinestoned-polka-patterned-design-stud-nail-sticker-nail-decoration-p-10441.html

Sweet Round 3D Rhinestones Nail Art Decoration
Link: http://www.bornprettystore.com/360pcs-25mm-sweet-round-rhinestones-nail-decoration-wbox-p-7297.html

Black Handled Nail Art Brush For Acrylic Nail Art
Link: http://www.bornprettystore.com/3pcsset-newly-black-handled-nail-brush-acrylic-nail-p-12309.html

For more products information and display, you can visit their website via links below:
  • http://www.bornprettystore.com/
  • http://www.bornprettystore.com/nail-c-268.html
  • http://www.bornprettystore.com/show.php?filter=new_arrivals&cid=268
GOOD NEWS!
For all my readers, you all can get 10% off for your purchase by using this code: P21X31 
Remember to enter the code before your checkout~~~

That's all for today's review.
xoxo.

If you all wanna...
Like my Facebook Page: Ridley's Bloggie
Follow my Twitter: Ridleyjing
Follow my Instagram: Ridleyjing
Follow my Tumblr: Ridleyjing
Subscribe to my channel: Ridley Jing
Friday, April 25, 2014 No comments
Hello people!
Today will be doing another review post about nail art thingy....

Thanks to Hishop and Bloop for giving me the chance to review about this nail sticker. Remembered when i was a kid, i used to play with stickers by sticking them onto my nails because it was pretty...lol. And the sticker that i received is the flowers nail stickers, and the important point is...IT IS WHITE COLOR FLOWER! That's means i can match it with any nail's color. lol.

The nail stickers are very easy to apply.


Firstly, you have to select the sticker you want... and then take it out.

Then align and place it onto your nails!

That's it! Easy right?
If you wanna make the stickers last longer, after you apply the stickers, you can apply a layer of top coat to protect it. It's very easy and convenience to DIY your own nail art and make your nails look nicer and prettier.

Personal thought:
It's very easy to apply onto the finger nails. The design i got was nice and easy to match with any nail color. If you realized, i did few review on Bloop Nail It product and i can assure that their products are long lasting. So why don't you try it out? lol

If you wanna look at other products, please visit the link below:
http://www.hishop.my/nails?brand=20

For more products and updates: 
‘Like’ Hishop on Facebook: https://www.facebook.com/hishopmy
‘Like’ bloop on Facebook: https://www.facebook.com/bloopinc
Follow Hishop on Twitter: http://www.twitter.com/hishop.my
Subscribe to HiShop for exclusive updates: http://www.hishop.my/subscribe

That's all.

xoxo.

If you all wanna...
Like my Facebook Page: Ridley's Bloggie
Follow my Twitter: Ridleyjing
Follow my Instagram: Ridleyjing
Follow my Tumblr: Ridleyjing
Subscribe to my channel: Ridley Jing
Thursday, February 20, 2014 No comments
Hello people,
Remember the previous review about nail art in my blog? That was for the finger nails and the product for today is about toe nail art...
Nail it! with bloop toe nail strip.

Thanks to Hishop and Bloop for giving me the chance to review about this product. I'm very in love with nail art but i normally go for finger nail art, so this toe nails strip is kinda a new thing for me. lol.

The main features of the nail strip are:
  • No drying time
  • Super thin
  • Fast and easy to use
  • Made with environmental-friendly materials
  • Allows air to penetrate through to nails
  • Last 5 - 7 days
Same as the finger nail strip, there's a very detail instruction on how to use this nail strip behind the package.
There are 9 steps stated in the instruction behind.

 So i shall begin the demonstration of how to use this nail strip in a simpler way!
So open the package first to take out the nail strip.

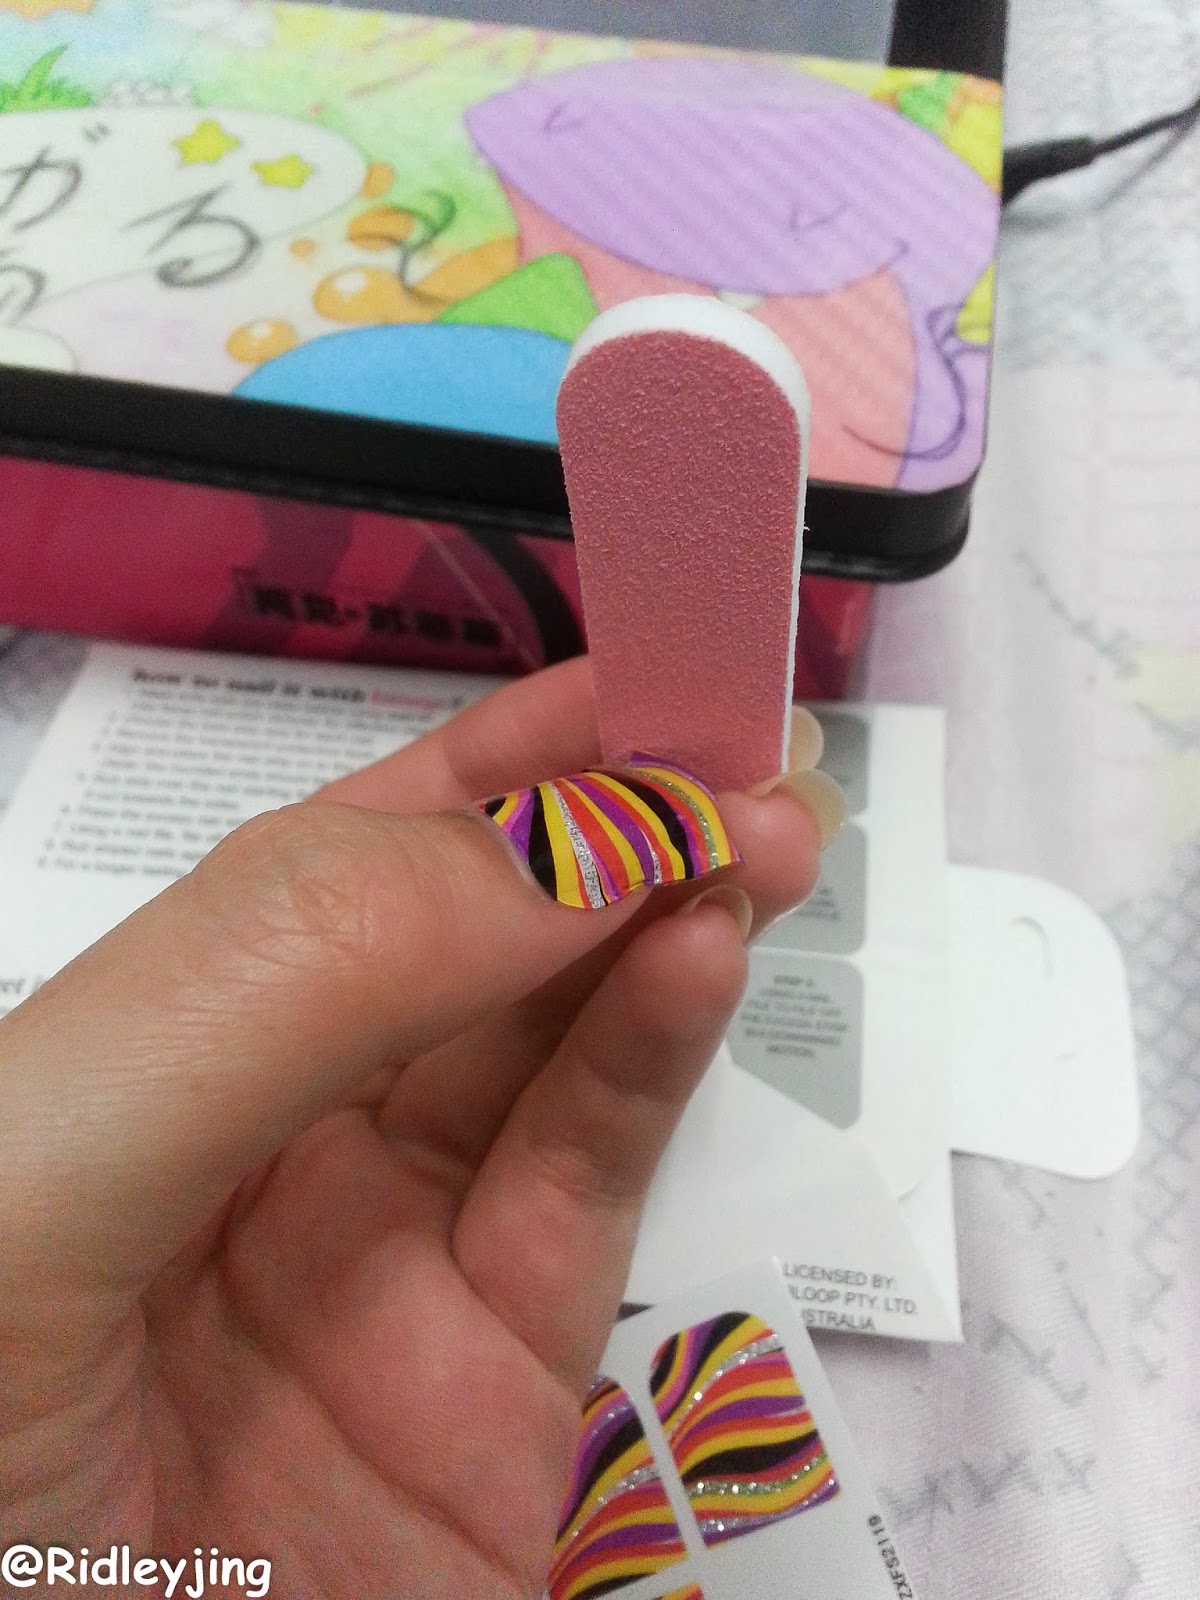
Inside the package, there will be one nail file and the nail strips.

Remove the nail strips from the plastic to take out the nail strips.

Remove the transparent protective layer first.

Then take out the nail strip carefully. Remember to take out carefully because the nail strips is very thin and it may breaks easily.

Select the correct size of nail strips and put the nail strips on your toe nail. Bear in mind that the rounded end of the nail strip should be facing the cuticle.

File off the extra part by using the nail file. Be sure to rub the strip over the nail starting from center working it out towards the sides to remove bubbles.

Here is it! Now you have pretty toe nail art with just few simple steps.

Personal thoughts:
I think that it's very good to have nail strips for toe nails because it's very easy to use. In order to have such a nail art, it's not easy, people have to know how to draw a nail art. So for a common people like me, i don't know how to draw. lol. The other thing that i like about this product very much is... it's pretty, there are not only available in one design, so you can actually have other different design by selecting the design you like when you shop for it. It's very great for party events also where you want to have pretty nails by using a quick way. And the main feature that i really like is, it can last more than a week (by applying a top coat on it)! Well, that's great because it last longer. 

For people who likes DIY nail art, you should try the Bloop nail strip.
Of course there are a lot of patterns for you to choose.
If you wanna look at other patterns, please visit the link below:
http://www.hishop.my/nails?brand=20

And lastly, a good news for my readers~

Exclusive RM20 rebate for my readers by using this code on Hishop: BLOOPNAILS
*With minimum purchase of RM99, valid till 31 January 2013*

For more products and updates: 
‘Like’ Hishop on Facebook: https://www.facebook.com/hishopmy
‘Like’ bloop on Facebook: https://www.facebook.com/bloopinc
Follow Hishop on Twitter: http://www.twitter.com/hishop.my
Subscribe to HiShop for exclusive updates: http://www.hishop.my/subscribe

That's all.

xoxo.

If you all wanna...
Like my Facebook Page: Ridley's Bloggie
Follow my Twitter: Ridleyjing
Follow my Instagram: Ridleyjing
Follow my Tumblr: Ridleyjing
Subscribe to my channel: Ridley Jing
Saturday, January 18, 2014 No comments
Hello people,
It's time for another review about nail art, the product for today is...

Nail it! with bloop nail strip.

Thanks to Hishop and Bloop for giving me the chance to review about this product. As i mentioned before, i'm a nail arts lover. lol.

The main features of the nail strip are:
  • No drying time
  • Super thin
  • Fast and easy to use
  • Made with environmental-friendly materials
  • Allows air to penetrate through to nails
  • Last 5 - 7 days


So i shall begin the demonstration of how to use this nail strip!
It's very thoughtful that they included the instructions of how to use this product behind the packaging, so as you can see, there are nine steps to use the nail strip.

After you open the the package, there are two items in it, one is the nail strip and the other one is the nail file.

Firstly, make sure that your nails are clean,. Then take out the nail strips and remove the transparent protective layer first and choose the correct strip size for your nail.

Take out the nail strip that suits your nail. It's a very thin layer of strips, so make sure you be careful when you take it out.

Then align and place the nail strip on your nail and make sure the rounded end is facing the cuticle. Then rub the strip over the nail starting from center working it out towards the sides.

Press the excess nail strip across the edges of the nail and file it off by using the nail file in a downward motion. Make sure you rub the strip to remove any excess bubbles.

Then apply nail strips on other finger nails by repeating the steps above.

And that's it! This is the final result for my finger nails. I did not fully apply all the nail strips on my nails because i tried to use the Bloop nail polish on my nails also.

Personal thought:
I kinda like the nail strips because it's very easy to use and apply. If i already learned how to use it, i can finish apply the nail strip in few minutes. It's very convenience and it's long lasting. It was stated there that the nail strips can last for 5 to 7 days and it really does. However, it's better that you apply a top coat to make it last even longer. 

For people who likes DIY nail art, you should try the Bloop nail strip.
Of course there are a lot of patterns for you to choose.
If you wanna look at other patterns, please visit the link below:
http://www.hishop.my/nails?brand=20

And lastly, a good news for my readers~

Exclusive RM20 rebate for my readers by using this code on Hishop: BLOOPNAILS
*With minimum purchase of RM99, valid till 31 January 2013*

For more products and updates: 
‘Like’ Hishop on Facebook: https://www.facebook.com/hishopmy
‘Like’ bloop on Facebook: https://www.facebook.com/bloopinc
Follow Hishop on Twitter: http://www.twitter.com/hishop.my
Subscribe to HiShop for exclusive updates: http://www.hishop.my/subscribe

That's all.

xoxo.

If you all wanna...
Like my Facebook Page: Ridley's Bloggie
Follow my Twitter: Ridleyjing
Follow my Instagram: Ridleyjing
Follow my Tumblr: Ridleyjing
Subscribe to my channel: Ridley Jing
Thursday, January 09, 2014 No comments
Older Posts

About me

About Me


Hello, I'm Ridley Jing. Welcome to my blog. This blog will be updated whenever I want. Have a nice day!

Follow Me

Popular Posts

recent posts

Instagram

Ridley's Channel

Twitter

Tweets by @Ridleyjing

Blog Archive

  • ▼  2019 (1)
    • ▼  February (1)
      • Althea x Titi Kamal Stay Fresh Body Sparkling Mist...
  • ►  2018 (5)
    • ►  October (1)
    • ►  September (1)
    • ►  May (1)
    • ►  April (1)
    • ►  January (1)
  • ►  2017 (15)
    • ►  August (3)
    • ►  July (1)
    • ►  June (2)
    • ►  May (2)
    • ►  April (3)
    • ►  March (2)
    • ►  February (2)
  • ►  2016 (16)
    • ►  December (2)
    • ►  November (1)
    • ►  October (1)
    • ►  August (3)
    • ►  July (2)
    • ►  June (2)
    • ►  May (2)
    • ►  April (1)
    • ►  February (2)
  • ►  2015 (24)
    • ►  December (1)
    • ►  November (1)
    • ►  October (1)
    • ►  September (1)
    • ►  August (2)
    • ►  July (3)
    • ►  June (1)
    • ►  May (3)
    • ►  April (2)
    • ►  March (3)
    • ►  February (3)
    • ►  January (3)
  • ►  2014 (54)
    • ►  December (3)
    • ►  November (5)
    • ►  October (2)
    • ►  September (2)
    • ►  August (4)
    • ►  July (4)
    • ►  June (4)
    • ►  May (4)
    • ►  April (7)
    • ►  March (5)
    • ►  February (5)
    • ►  January (9)
  • ►  2013 (108)
    • ►  December (11)
    • ►  November (8)
    • ►  October (9)
    • ►  September (9)
    • ►  August (8)
    • ►  July (7)
    • ►  June (8)
    • ►  May (13)
    • ►  April (16)
    • ►  March (9)
    • ►  February (5)
    • ►  January (5)
  • ►  2012 (27)
    • ►  December (3)
    • ►  November (6)
    • ►  October (5)
    • ►  September (3)
    • ►  August (2)
    • ►  July (2)
    • ►  June (3)
    • ►  January (3)

Labels

Anime Beauty Book Cafe Hopping Charity Concert Contest Cosmetics Cosplay Dessert Diary DIY Event Food Friends Gadget Game Haul IT Japan Culture Korean Manga Merchandise Model Movie My Style Nail Art Outing Photoshoot Random Review Ridley Sponsored Travel Tutorial Unbox YouTube
FOLLOW ME @INSTAGRAM

Created with by ThemeXpose | Distributed By Gooyaabi Templates